
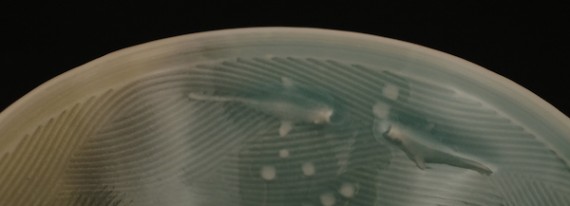
Harlan House Celadon on Fish Soup Bowl
[table style=”table_gray” shadow=”1″] [title type=”h4″ class=”tfuse”]Table 1. 304 Celadon Glaze using G200 purchased before 2009[/title]
| Clay Body Component | 1996 | 1996 | 1998 | 1998 | 1998 | 2000 |
|---|---|---|---|---|---|---|
| Potspar | 28 | 28 | 30 | 25.5 | 21 | 25 |
| Whiting | 20 | 18 | 18 | 18.5 | 19 | 18 |
| Kaolin | 20.5 | 20 | 19 | 21 | 23 | 20 |
| Flint | 34 | 35 | 34 | 35.5 | 37 | 37 |
| Iron Oxide | 1.5 | 1 | 1 | 1 | 1 | 1 |
- Potash Feldspar is G200 Potash [ pre-2009; if using modern G200 add soda feldspar to the new G200; replace the formula with 30% F4 soda spar and 70% modern G200]
- Whiting is Snow White 21-PT
- Flint is 40 micron Silica
- Iron oxide is Micronized Spanish Red Iron Oxide. Cheaper iron oxides will give spotty inferior results.
[divider type=”thin”]
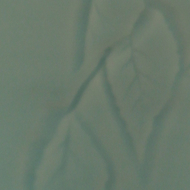
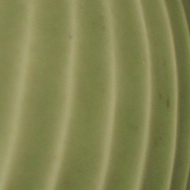
One of the easiest ways of changing the color, and to some extent the surface quality of a celadon glaze is to just change the clay used in the glaze. Here are just a few that I use on a routine basis. You can also play with the iron oxide adding or subtracting for color changes. Keep in mind that more iron will lower the melting point of the glaze.
- For yellow green replace Grolleg with Bell dark ball clay
- For Koryo replace Grolleg with Edgar Plastic kaolin (EPK)
- For Qing Bai [or Ying Qing] use Grolleg and leave out the iron oxide

A very important aspect in making good celadon glazes is in the mixing. Add the iron oxide to the water and blunge for at least ten minutes before adding any of the ingredients. After adding the minerals to the iron/water mix, blunge again for at least ½ hour. This eliminates the problem of iron spotting, and eliminates the need for endless screening. It is also important to know that usually celadon glazes are applied thickly. This means that there must be a lot of time between glazing the inside and the outside of a pot. I always put at least 1 day between each coat of glaze and two if possible.
The final glaze should have a specific gravity of about 1.43 to 1.46.
If you are interested in copper red glazes, this celadon glaze is a good starting spot. Exchange G200 for F4 soda feldspar, and add color enhancers like a little tin oxide and maybe zinc oxide and of course a very tiny bit of copper carbonate. F4 will lower the temperature of the melt, so you will need to add a bit of silica to make up for that. Keep in mind that copper reds like to be applied very thickly and may run if over-fired. I find that EPK or Bell dark ball clays in this glaze yield better and more interesting reds. My copper red glaze to follow later on.
It is always a good idea, especially if you are pouring the insides of your work, to pour the glaze back into the container through a fine screen. There are almost always little bits of fired clay from handling or trimming inside where you cannot see them…so screening the glaze helps keep the “bits” where they should be…not on the surface of a fine platter or in the bottom of a bowl. You can buy really inexpensive screens in the kitchen departments of major stores…they are used for covering frying pans when cooking greasy things…they work like a charm, and are a good size physically as well as screen or mesh size…and cheap!
Harlan House RCA
[title type=”h4″ class=”tfuse”]Gallery[/title] Click on any image to see picture gallery.[minigallery id=”1608″]
Comments 1
Pingback: Celadon receipe | Anna Simson